Today’s article of our WebDrivers series deals with HTTP authentication – a topic that, at first sight, seems to be very specific and of minor relevance. However, in the world of software testing it’s way more important than you’d think. 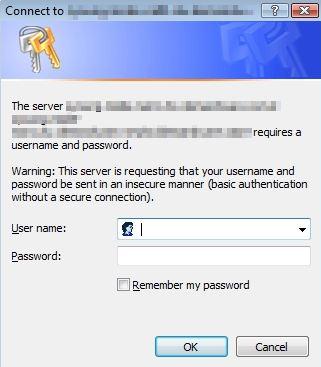
This browser dialog appears just once. If you’ve entered the right credentials, you can access the related website as often as you like without further authentication – as long as you don’t reopen the browser. The latter is a critical issue for automated WebDriver testing.
Two circumstances are responsible for this:
- You can’t perform automated tests using WebDrivers without reopening the browser
- Browser dialogs like the one above can’t be accessed during test automation without using other tools
Is there a way to solve this problem? Yes, there is! Go on reading to learn how to achieve basic access authentication during automated testing for each WebDriver.
XltDriver
As a headless browser, the XltDriver lets you transmit the authentication credentials via a property setting. Just look in the XLT default-properties file for the following two properties and adapt them (replace placeholders):
com.xceptance.xlt.auth.userName = USERNAME
com.xceptance.xlt.auth.password = PASSWORD
As for the third-party WebDrivers, you unfortunately have to do without this option.
Yet there’s still another way to achieve authentication: passing the credentials via the URL. This is not recommended for private use, but a useful option in the context of development and testing. The URL has to match the following pattern:
http://username:password@example.com
ChromeDriver/OperaDriver
For these WebDrivers, you can go for the credentials-via-URL-option without any additional expenses. Just adapt the respective base URL in your test cases appropriately and basic access authentication will no longer be a hurdle.
FirefoxDriver
When you enter the URL, the Firefox browser displays such a confirmation dialogue:

Remember that browser dialogues can’t be accessed during automated testing? Thus, we have to dismiss this message. In Firefox, you just need to customize this configuration put about:config into the Firefox address bar and search on the config page for the property
network.http.phishy-userpass-length
If such a property doesn’t exist, create it. Right-click and select “New”.
Set the type to Integer and the value really high, maybe 1024, and you end up with the following:

From now on, the dialogue won’t come up anymore and you can use the URL access method for test automation.
InternetExplorerDriver
Ever since the release of Internet Explorer 7, the use of URL patterns with embedded credentials like shown above has been disabled due to security concerns. Granted, a good thing for “normal” users, but you are a tester and definitely need this ability. Luckily, you can overcome the disabling by modifying the registry. Open the registry explorer by typing regedit into the Windows command line. Search for the registry key
HKEY_LOCAL_MACHINE\Software\Microsoft\Internet
Explorer\Main\FeatureControl\FEATURE_HTTP_USERNAME_PASSWORD_DISABLE
Inside this folder, create two new DWORD-Values (if they don’t already exist). Right-click, select “New” > “DWORD-Value (32-Bit)”, and have them named iexplore.exe and explorer.exe. Their values have to be set to 0 (double-click) as shown below:

As we all know that playing around in the registry is a terrible idea when you don’t know what you’re doing, you should be absolutely careful and make sure to select the correct registry key and value names. Registry changes normally require a restart. If you’ve done everything the right way, the authentication via URL should work and allow automated testing with the InternetExplorerDriver.
Stay tuned for our next blog entry that will talk about mobile WebDrivers and how to use them.